Wesbeam is the only Australian manufacturer of LVL and LVL I-joists. For the best results, our customers need to understand best practices when working with our timber products. In this blog, we cover three things you should know when working with Wesbeam LVL and LVL I-joists to help you better understand our products.
Timber Treatment
Timber products require different types of treatment depending on how and where it’s being used. To determine the treatment level required consider the following issues:
- Level of protection - is the timber being used inside or outside?
- Design of building or component - is it above ground or in contact with the ground?
- The degree of structural reliability required - degree of load sharing
- The presence of hazards - moisture, decay, fire, etc.
- Climate - is it North or South of the Tropic of Capricorn?
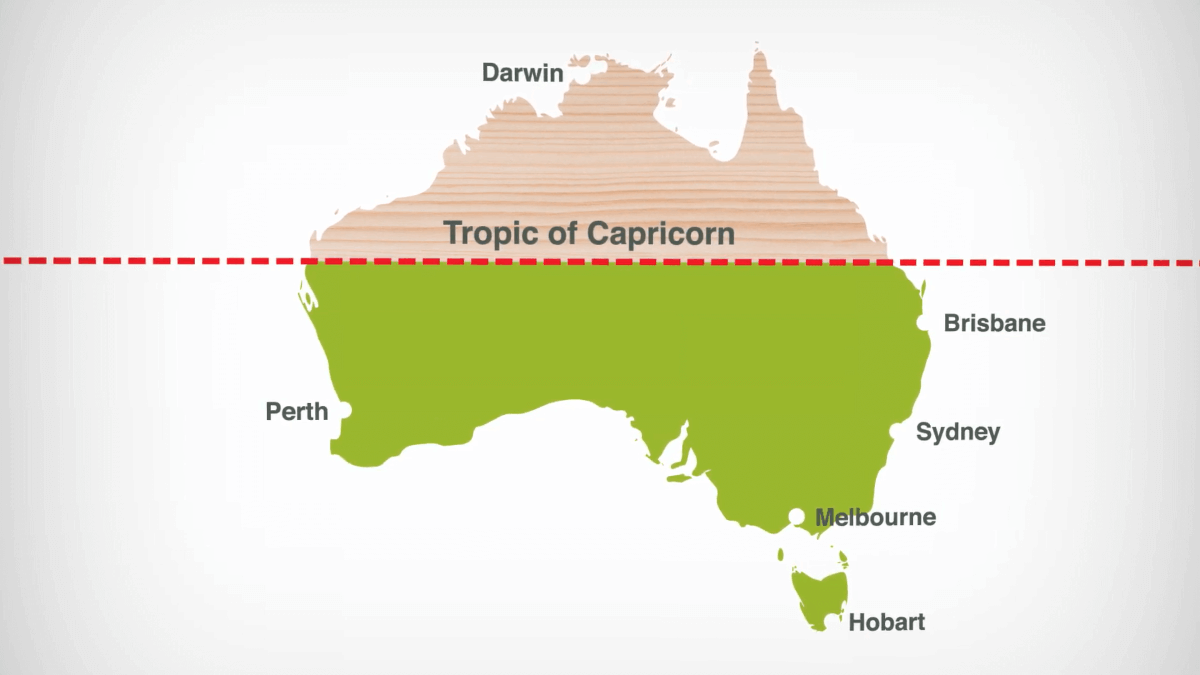
Regardless of where the product is being used, we recommend that it be termite treated. Wesbeam’s e-joists are manufactured to an e2S level preservative treatment. This makes our timber suitable for use South of the tropic of Capricorn, much like H2S pine.
Wesbeam’s e2S treatment is included in the glue line we use. This means you are not compromising the termite protection when you cut, notch, splay, or drill a hole in the Wesbeam e2S treated LVL. When Wesbeam LVL is used North of the Tropic of Capricorn, H2S treatment is required to protect against more aggressive termites.
Supporting exposed decking protection against fungal attacks is required in exposed applications such as bearers and joists. LVL and I-joists are treated to level h3 for protection against termite and fungal attacks.
Notching and Cutting
The rules for cutting and notching all timber products are set out in AS 1684. There are no special rules for Wesbeam LVL. For LVL beams deeper than 200mm, you can drill a hole through the side with a diameter of up to 50mm.
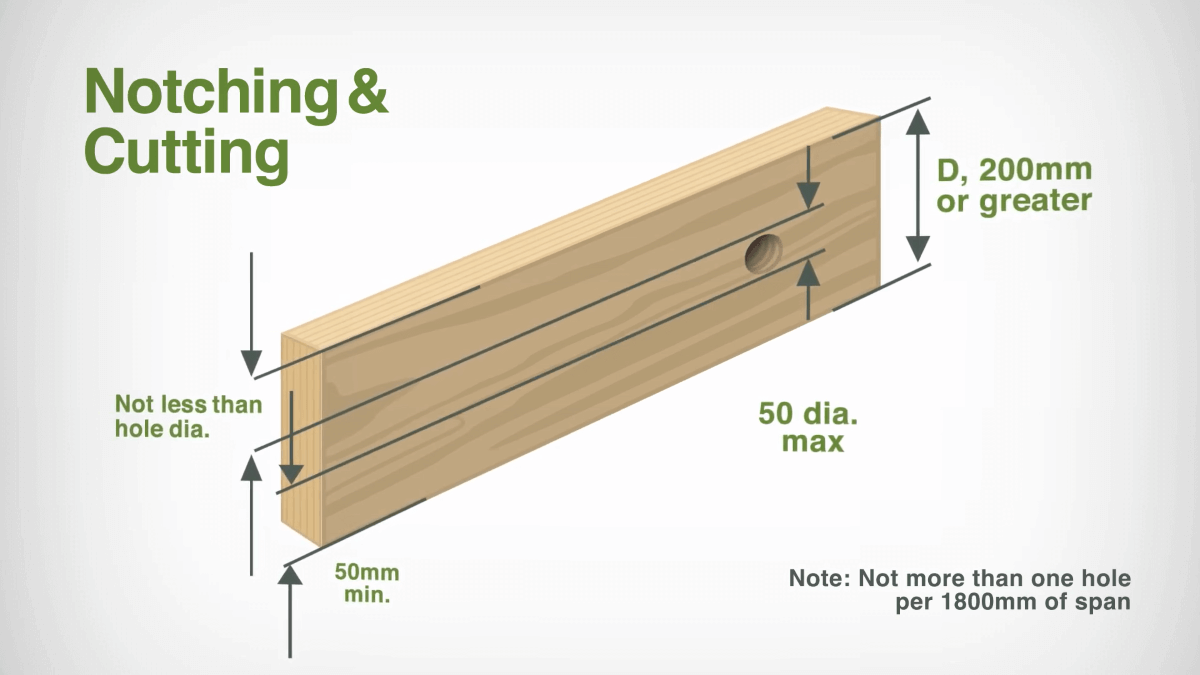
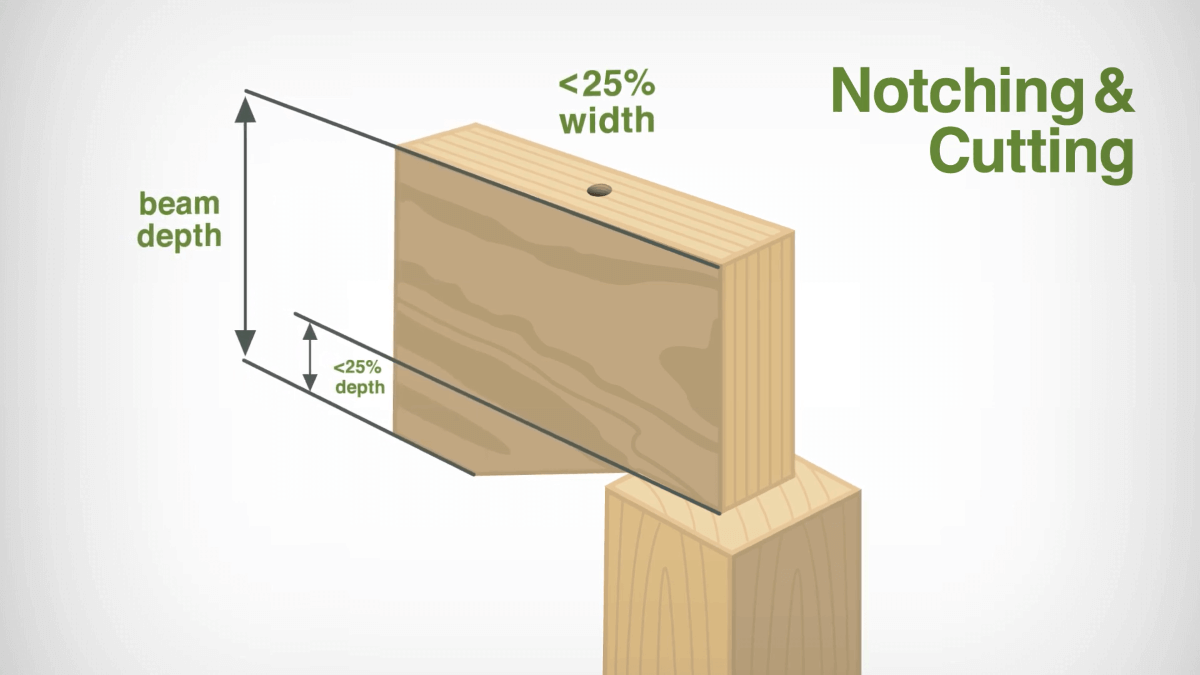
Under no circumstances should you cut or drill flanges. Holes for the installation of ducts, service pipes and electrical conduit can be cut through e-joist webs. To run an electrical conduit, you can notch and splay 25% of the beam depth at the ends. To fit into a supporting structure or onto a wall, you can drill a vertical hole through the LVL up to a maximum diameter of 25% of the beam's width.
Just like other structural timber, you cannot drill larger holes in the beam for things like plumbing and air conditioning. Our technical information sheet explains this further, or contact Wesbeam's technical team for further information on this.
LVL Sizing
There are three things you need to know to find the right size beam for your job. Firstly define the application. What is the beam’s purpose? Is it a roof beam supporting rafters? Is it a lintel in a wall frame or a floor joist supporting a heavy floor?
Next, define the span. What is the distance between the walls or beams supporting the beam? It might be a single span or span across an intermediate support creating a continuous span.
Lastly, define the loads. Determine how much weight will be applied to the beam. This depends on what components the beam is supporting. This could include roof cladding, metal sheeting or tiles. It’s also important to see whether the beam is supporting a wall or flooring.
With these pieces of information, the LVL size can be determined using our e-beam span charts or by phoning the Wesbeam technical hotline.
Wesbeam aims to make using our LVL and LVL i-joist products as easy as possible. That’s why we’re dedicated to answering your questions and providing top-notch resources and services. If you have any further questions about our products or services, the Wesbeam technical support team is here to help.